Namecheapさんで、Comodo PositiveSSLを購入して、apache + mod_sslの環境下に設定したので、来年のためにメモ

登録用のCSRの作成
|
1 2 3 4 5 6 7 8 |
$ openssl req -new -newkey rsa:2048 -nodes -keyout server.key -out server.csr Country Name (2 letter code) [AU]:AU State or Province Name (full name) [Some-State]:New South Wales Locality Name (eg, city) []:Sydney Organization Name (eg, company) [Internet Widgits Pty Ltd]:会社名だよ Organizational Unit Name (eg, section) []: Common Name (e.g. server FQDN or YOUR name) []:ドメイン Email Address []:メールアドレス |
証明書の認証
購入後、SSL Certificatesの画面よりActiveにする。
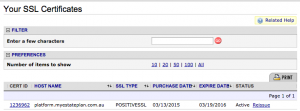
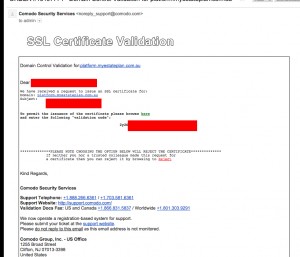
すると登録した確認用メールに下記のようなメールが届きます。
validation codeがあるので、それを使用して認証をすすめます。
次に、サーバに設置するようの鍵ファイルが送られてきます。
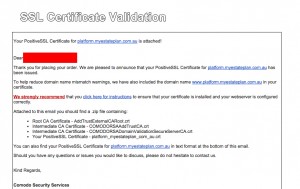
こんな感じの証明書ですね
– Root CA Certificate – AddTrustExternalCARoot.crt
– Intermediate CA Certificate – COMODORSAAddTrustCA.crt
– Intermediate CA Certificate – COMODORSADomainValidationSecureServerCA.crt
– Your PositiveSSL Certificate – ドメイン名.crt
証明書を作る
上記の鍵から証明書を作る
やっていることは、単純に3つの鍵をドメイン.cerにまとめているだけです。
|
1 |
cat COMODORSAAddTrustCA.crt COMODORSADomainValidationSecureServerCA.crt AddTrustExternalCARoot.crt > ドメイン.cer |
apacheに設置
|
1 2 3 4 5 6 7 |
$ sudo vi /etc/apache2/sites-available/default-ssl # メールで添付させてきたもの SSLCertificateFile /home/user/ssl-key/ドメイン.crt # 一番はじめに自分で作ったもの SSLCertificateKeyFile /home/user/ssl-key/server.key # 3っつのファイルをまとめたもの SSLCACertificateFile /home/user/ssl-key/ドメイン.cer |
Twitter:
Warning: Undefined array key "Twitter" in /home/sazaeau/mizoshiri.com/public_html/blog.mizoshiri.com/wp-content/plugins/sns-count-cache/sns-count-cache.php on line 2897
0 | Facebook: 0 | Google Plus:
Warning: Undefined array key "Google+" in /home/sazaeau/mizoshiri.com/public_html/blog.mizoshiri.com/wp-content/plugins/sns-count-cache/sns-count-cache.php on line 2897
0 | Hatena: 1 | Pocket: 1 | Total: 2 | Feedly: 0
