下記のエラーがでました。
|
1 2 3 4 5 |
$ vagrant up A version of the box you're loading is formatted in a way that Vagrant cannot parse: '2.0.0-alpha'. Please reformat the version to be properly formatted. It should be in the format of X.Y.Z. |
解決方法
|
1 2 |
$ vi Vagrantfile config.vm.box_check_update = false |
Twitter:
Warning: Undefined array key "Twitter" in /home/sazaeau/mizoshiri.com/public_html/blog.mizoshiri.com/wp-content/plugins/sns-count-cache/sns-count-cache.php on line 2897
0 | Facebook: 0 | Google Plus:
Warning: Undefined array key "Google+" in /home/sazaeau/mizoshiri.com/public_html/blog.mizoshiri.com/wp-content/plugins/sns-count-cache/sns-count-cache.php on line 2897
0 | Hatena: 0 | Pocket: 0 | Total: 0 | Feedly: 0
Mac – homebrewでrbenvを使用している場合のアップグレード方法
Aug 21, 2015rbenvを使ってRubyの環境を構築していると思うのですが、
最新のRubyのVersionを入れたい場合、始めにrbenvのUpgradeをしたほうがより最新のものが入ってきますので、その方法をメモしておきます。
|
1 2 |
brew update brew upgrade rbenv ruby-build |
これで終わりです。
あとは、下記のコマンドで最新のRubyの一覧がでてきます。
|
1 |
rbenv install -l |
Installはこんな感じですね。
|
1 2 3 4 5 |
rbenv install 2.2.3 rbenv global 2.2.3 rbenv rehash ruby -v ruby 2.2.3p173 (2015-08-18 revision 51636) [x86_64-darwin14] |
Twitter:
Warning: Undefined array key "Twitter" in /home/sazaeau/mizoshiri.com/public_html/blog.mizoshiri.com/wp-content/plugins/sns-count-cache/sns-count-cache.php on line 2897
0 | Facebook: 0 | Google Plus:
Warning: Undefined array key "Google+" in /home/sazaeau/mizoshiri.com/public_html/blog.mizoshiri.com/wp-content/plugins/sns-count-cache/sns-count-cache.php on line 2897
0 | Hatena: 0 | Pocket: 1 | Total: 1 | Feedly: 0
QQMusicのDownloadの置き場はここらしいですね – for Mac
Jun 11, 2015MacのDisk容量がなくなってきたので、QQ Musicで音楽をダウンロード設定しているのですが、300曲くらいダウンロードしているの容量どれくらい使っているか知りたくて調べました。
|
1 |
cp ~/Library/Application\ Support/QQMusicMac/ |
Twitter:
Warning: Undefined array key "Twitter" in /home/sazaeau/mizoshiri.com/public_html/blog.mizoshiri.com/wp-content/plugins/sns-count-cache/sns-count-cache.php on line 2897
0 | Facebook: 0 | Google Plus:
Warning: Undefined array key "Google+" in /home/sazaeau/mizoshiri.com/public_html/blog.mizoshiri.com/wp-content/plugins/sns-count-cache/sns-count-cache.php on line 2897
0 | Hatena: 0 | Pocket: 0 | Total: 0 | Feedly: 0
Vagrant + VirtualBox の環境で紐付けが壊れた際に復旧する方法 – Mac
Apr 25, 2015Macを強制終了したら、VagrantとVirtualBoxのリンクがなぜか切れて、vagrant upで立ち上げると新規にBoxをつくろうとするトラブルにあいました。
で、調べたところ.vagrantがもっているVirtualBoxのIDを設定がなくっているようなので、調べてつなげてあげて解決できました。
解決方法
|
1 2 |
$ VBoxManage list vms "Boxの名前" {1d2d2dee0-b3ad-4d7d-9e14-ca3d24a8s4f50}//UUID |
このUUIDをコピーしてきます。そのあと下記のファイルに追加して完了です。
|
1 2 |
$ vi .vagrant/machines/default/virtualbox/id 1d2d2dee0-b3ad-4d7d-9e14-ca3d24a8s4f50 |
Twitter:
Warning: Undefined array key "Twitter" in /home/sazaeau/mizoshiri.com/public_html/blog.mizoshiri.com/wp-content/plugins/sns-count-cache/sns-count-cache.php on line 2897
0 | Facebook: 0 | Google Plus:
Warning: Undefined array key "Google+" in /home/sazaeau/mizoshiri.com/public_html/blog.mizoshiri.com/wp-content/plugins/sns-count-cache/sns-count-cache.php on line 2897
0 | Hatena: 1 | Pocket: 1 | Total: 2 | Feedly: 0
Macでアップを指定してコマンドからファイルを開く
Mar 24, 2015今いるフォルダをAtomで開く
|
1 |
open ./ -a Atom |
memo.txtをChormeで開く
|
1 |
open memo.txt -a Google\ Chrome |
ちなみに、zshを使っているかもしれませんが、-aを入力してTabを押すとアプリケーションを補完してくれます(/Application/の中に入っている状態ですね。)
Twitter:
Warning: Undefined array key "Twitter" in /home/sazaeau/mizoshiri.com/public_html/blog.mizoshiri.com/wp-content/plugins/sns-count-cache/sns-count-cache.php on line 2897
0 | Facebook: 0 | Google Plus:
Warning: Undefined array key "Google+" in /home/sazaeau/mizoshiri.com/public_html/blog.mizoshiri.com/wp-content/plugins/sns-count-cache/sns-count-cache.php on line 2897
0 | Hatena: 0 | Pocket: 0 | Total: 0 | Feedly: 0
Macでコマンドから複数のファイルの拡張子を一括に変更する方法
Mar 12, 2015こんな感じのファイル郡を一括にhtmlからphpに変更したい場合
|
1 2 3 4 |
$ ls index.html test.html contactus.html |
解決方法
|
1 2 3 |
$ for f in *.html; do mv $f ${f%.html}.php; done |
Twitter:
Warning: Undefined array key "Twitter" in /home/sazaeau/mizoshiri.com/public_html/blog.mizoshiri.com/wp-content/plugins/sns-count-cache/sns-count-cache.php on line 2897
0 | Facebook: 0 | Google Plus:
Warning: Undefined array key "Google+" in /home/sazaeau/mizoshiri.com/public_html/blog.mizoshiri.com/wp-content/plugins/sns-count-cache/sns-count-cache.php on line 2897
0 | Hatena: 0 | Pocket: 0 | Total: 0 | Feedly: 0
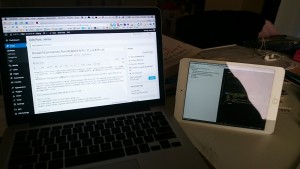
iPad mini2(Retina, White, 16GB )を買いました。
Jan 24, 2015iPad miin2 のRetina, White 16GBを購入しました。
$369 AUDでした。
Get Air Displayを使ってDualモニターにしても使えるのでこれまた便利。

今回で2台目のタブレット機
2012年3月に購入のSamsung Galaxy Tab 7.7が初代で今回で2台目のタブレットです。
正直Samsung Galaxy Tab 7.7はさほど使っていなかったです。
その当時はタブレットブームがちょうど到来していて、ほとんどのものがサイズがでかかったのですが、Samsung Galaxy Tab 7.7は名前の通りサイズは7.7で軽さも340gと今から3年前にiPad miniとほぼ同じHard構成で売り出せれていました。
でも、ぜんぜん流行りませんでしたけどね。
この機種問題はOSの使い心地や、よくフリーズしたので、結局使わなくなりました。
あと充電用のコードの独自コードだったので、それも面倒でした。
たまに、Kindle機としてつかっていたぐだいでした。
で、今回はiPad mini2は期待しております。
2015年はもっと本を読もうと思うので、kindleのPepar Whiteを購入するかで悩んだのですが、結局こちらにしました。
Twitter:
Warning: Undefined array key "Twitter" in /home/sazaeau/mizoshiri.com/public_html/blog.mizoshiri.com/wp-content/plugins/sns-count-cache/sns-count-cache.php on line 2897
0 | Facebook: 0 | Google Plus:
Warning: Undefined array key "Google+" in /home/sazaeau/mizoshiri.com/public_html/blog.mizoshiri.com/wp-content/plugins/sns-count-cache/sns-count-cache.php on line 2897
0 | Hatena: 0 | Pocket: 0 | Total: 0 | Feedly: 0
Vagrant command not found エラー in rbenv + zsh
Feb 17, 2014会社から支給されたMacBook Proの環境構築中に地味にハマったので、メモしておきます。
はじめに、rbenvでRuby2.1の環境を構築してから、Vagrantをgem installで入れたのですが、Versionが1.08と古かったので、gem uninstall vagrantで消しました。
その後、Vagrantのサイトからdmgをダウンロードしてきて、最新のvagrant(1.4.3)を入れたのですが、terminalでvagrantを叩いても、下記ようなエラーになり地味に解決までに時間がかかりました。
|
1 2 3 |
$ vagrant -v rbenv: vagrant: command not found The `vagrant' command exists in these Ruby versions:2.1.0 |
はじめは、zshの問題かと思い、.zshrcなどにaliasを追加したのですが、それでもだめでした。
oh-my-zshでzshを管理しているので、oh-my-zshの問題かと思い調べていたのですが、解決方法は簡単でした。
|
1 2 3 4 |
$ vi ~/.zshrc alias vagrant /Applications/Vagrant/bin/vagrant $ source ~/.zshrc |
解決方法
問題はgemで入れた残骸の問題でした。
なので、下記のように残骸を消して問題なく解決できましたとー
|
1 2 3 4 5 |
$ which vagrant /Users/UserName/.rbenv/shims/vagrant $ rm -rf /Users/UserName/.rbenv/shims/vagrant $ vagrant -v Vagrant 1.4.3 |
Twitter:
Warning: Undefined array key "Twitter" in /home/sazaeau/mizoshiri.com/public_html/blog.mizoshiri.com/wp-content/plugins/sns-count-cache/sns-count-cache.php on line 2897
0 | Facebook: 0 | Google Plus:
Warning: Undefined array key "Google+" in /home/sazaeau/mizoshiri.com/public_html/blog.mizoshiri.com/wp-content/plugins/sns-count-cache/sns-count-cache.php on line 2897
0 | Hatena: 0 | Pocket: 0 | Total: 0 | Feedly: 0
Homebrew のUpdateでgit pullエラー
Jan 27, 2014MacのHomebrew自体のバージョンを上げようと思いupdateするとエラーでできませんでした。
|
1 2 |
$ sudo brew update Error: Failure while executing: git pull -q origin refs/heads/master:refs/remotes/origin/master |
解決方法
brewさん自体がすでに更新されている状態なので、updateするとpullしようとするとぶつかってしまうのが問題のようです。
なので、git fetchで最新を落として、resetでインデックス、ワーキングツリーをすべて変更しています。
|
1 2 3 |
$ cd /usr/local $ git fetch origin $ git reset --hard origin/master |
Twitter:
Warning: Undefined array key "Twitter" in /home/sazaeau/mizoshiri.com/public_html/blog.mizoshiri.com/wp-content/plugins/sns-count-cache/sns-count-cache.php on line 2897
0 | Facebook: 0 | Google Plus:
Warning: Undefined array key "Google+" in /home/sazaeau/mizoshiri.com/public_html/blog.mizoshiri.com/wp-content/plugins/sns-count-cache/sns-count-cache.php on line 2897
0 | Hatena: 0 | Pocket: 0 | Total: 0 | Feedly: 0
Search Keyword
Meta
WEB developer
FacebookPage
Popular Posts
Sorry. No data so far.
ARCHIVES
- November 2024 (2)
- November 2019 (1)
- October 2019 (1)
- January 2019 (1)
- September 2018 (1)
- August 2018 (1)
- July 2018 (1)
- June 2018 (1)
- May 2018 (1)
- February 2018 (2)
- December 2017 (1)
- November 2017 (1)
- August 2017 (2)
- July 2017 (2)
- June 2017 (1)
- May 2017 (2)
- March 2017 (3)
- January 2017 (2)
- November 2016 (1)
- October 2016 (5)
- September 2016 (1)
- August 2016 (2)
- June 2016 (5)
- May 2016 (1)
- February 2016 (1)
- January 2016 (1)
- November 2015 (2)
- October 2015 (3)
- September 2015 (3)
- August 2015 (13)
- July 2015 (13)
- June 2015 (6)
- May 2015 (5)
- April 2015 (4)
- March 2015 (12)
- February 2015 (5)
- January 2015 (13)
- December 2014 (3)
- November 2014 (8)
- October 2014 (1)
- September 2014 (2)
- August 2014 (1)
- June 2014 (5)
- May 2014 (2)
- April 2014 (1)
- March 2014 (1)
- February 2014 (4)
- January 2014 (1)
- December 2013 (2)
- October 2013 (1)
- September 2013 (2)
- August 2013 (4)
- July 2013 (1)
- June 2013 (1)
- May 2013 (4)
- April 2013 (1)
- March 2013 (2)
- February 2013 (10)
- January 2013 (3)
- November 2012 (1)
- October 2012 (5)
- September 2012 (1)
- August 2012 (7)
- July 2012 (2)
- May 2012 (5)
- March 2012 (8)
- February 2012 (6)
- October 2011 (1)
- September 2011 (1)
- July 2011 (5)
- June 2011 (1)
- May 2011 (3)
- April 2011 (2)
- March 2011 (7)
- December 2010 (1)
- November 2010 (5)
- October 2010 (2)
- September 2010 (1)
- July 2010 (3)
- June 2010 (1)
- May 2010 (2)
- April 2010 (3)
- March 2010 (2)
- February 2010 (4)
- January 2010 (1)
- December 2009 (2)
- November 2009 (6)
- October 2009 (5)
- September 2009 (9)
- August 2009 (18)
- July 2009 (6)
- June 2009 (3)
- May 2009 (5)
- April 2009 (3)
- March 2009 (7)
- February 2009 (8)
- January 2009 (3)
- December 2008 (1)
- November 2008 (1)
- October 2008 (10)
- September 2008 (9)
- August 2008 (14)
- July 2008 (9)
- June 2008 (3)
- May 2008 (2)
- April 2008 (4)
- March 2008 (9)
- February 2008 (24)
- January 2008 (6)
- December 2007 (2)
- November 2007 (4)
- September 2007 (2)
- August 2007 (2)
- July 2007 (1)
- June 2007 (2)
- May 2007 (10)
- May 2000 (1)
- November 200 (1)


